
Ceramic image transfer technique and painting process
Australian terraced house planter commission

The piece I have identified for this demonstration of my painting process is that of a planter with a terraced house illustration.
This piece was commissioned, so there are perhaps a few more steps than usually taken when developing my own work at Casa Adams. I have strived to give an exhaustive account of the painting process in the following pictures. If you have any questions about anything explained, please feel free to drop me a message at araceli@casaadams.com.au.
Now… on to the demonstration, shall we?

I met the previous owners of this house at a fair where I had a stall selling my wares. They had recently sold it and wanted a memento of their old home. The brief was to paint it on a planter, with the windows on (so in yellow) and the door invitingly open.
They provided me with some promotional material from the sale, and I was able to look up the address on Google street view in order to get a bit more detail of the facade. The wide lenses used by photographers when selling real estate tend to be somewhat deceiving so it was helpful to have other sources with images for the house.

The first step was to see if I had the right underglaze colours. Throughout the many years I have been making pottery I have bought underglazes from various countries and brands. It’s a bit of a mish mash but I tend to paint with the colours I have at hand. Mixing colours requires a lot of time, as you have to test them, so it’s something I try to avoid if I can.
In this case, I really needed a good dark green. The top row was supposed to contain a plethora of greens but they just don’t work with my current clay and glaze, so on to experimenting I went!
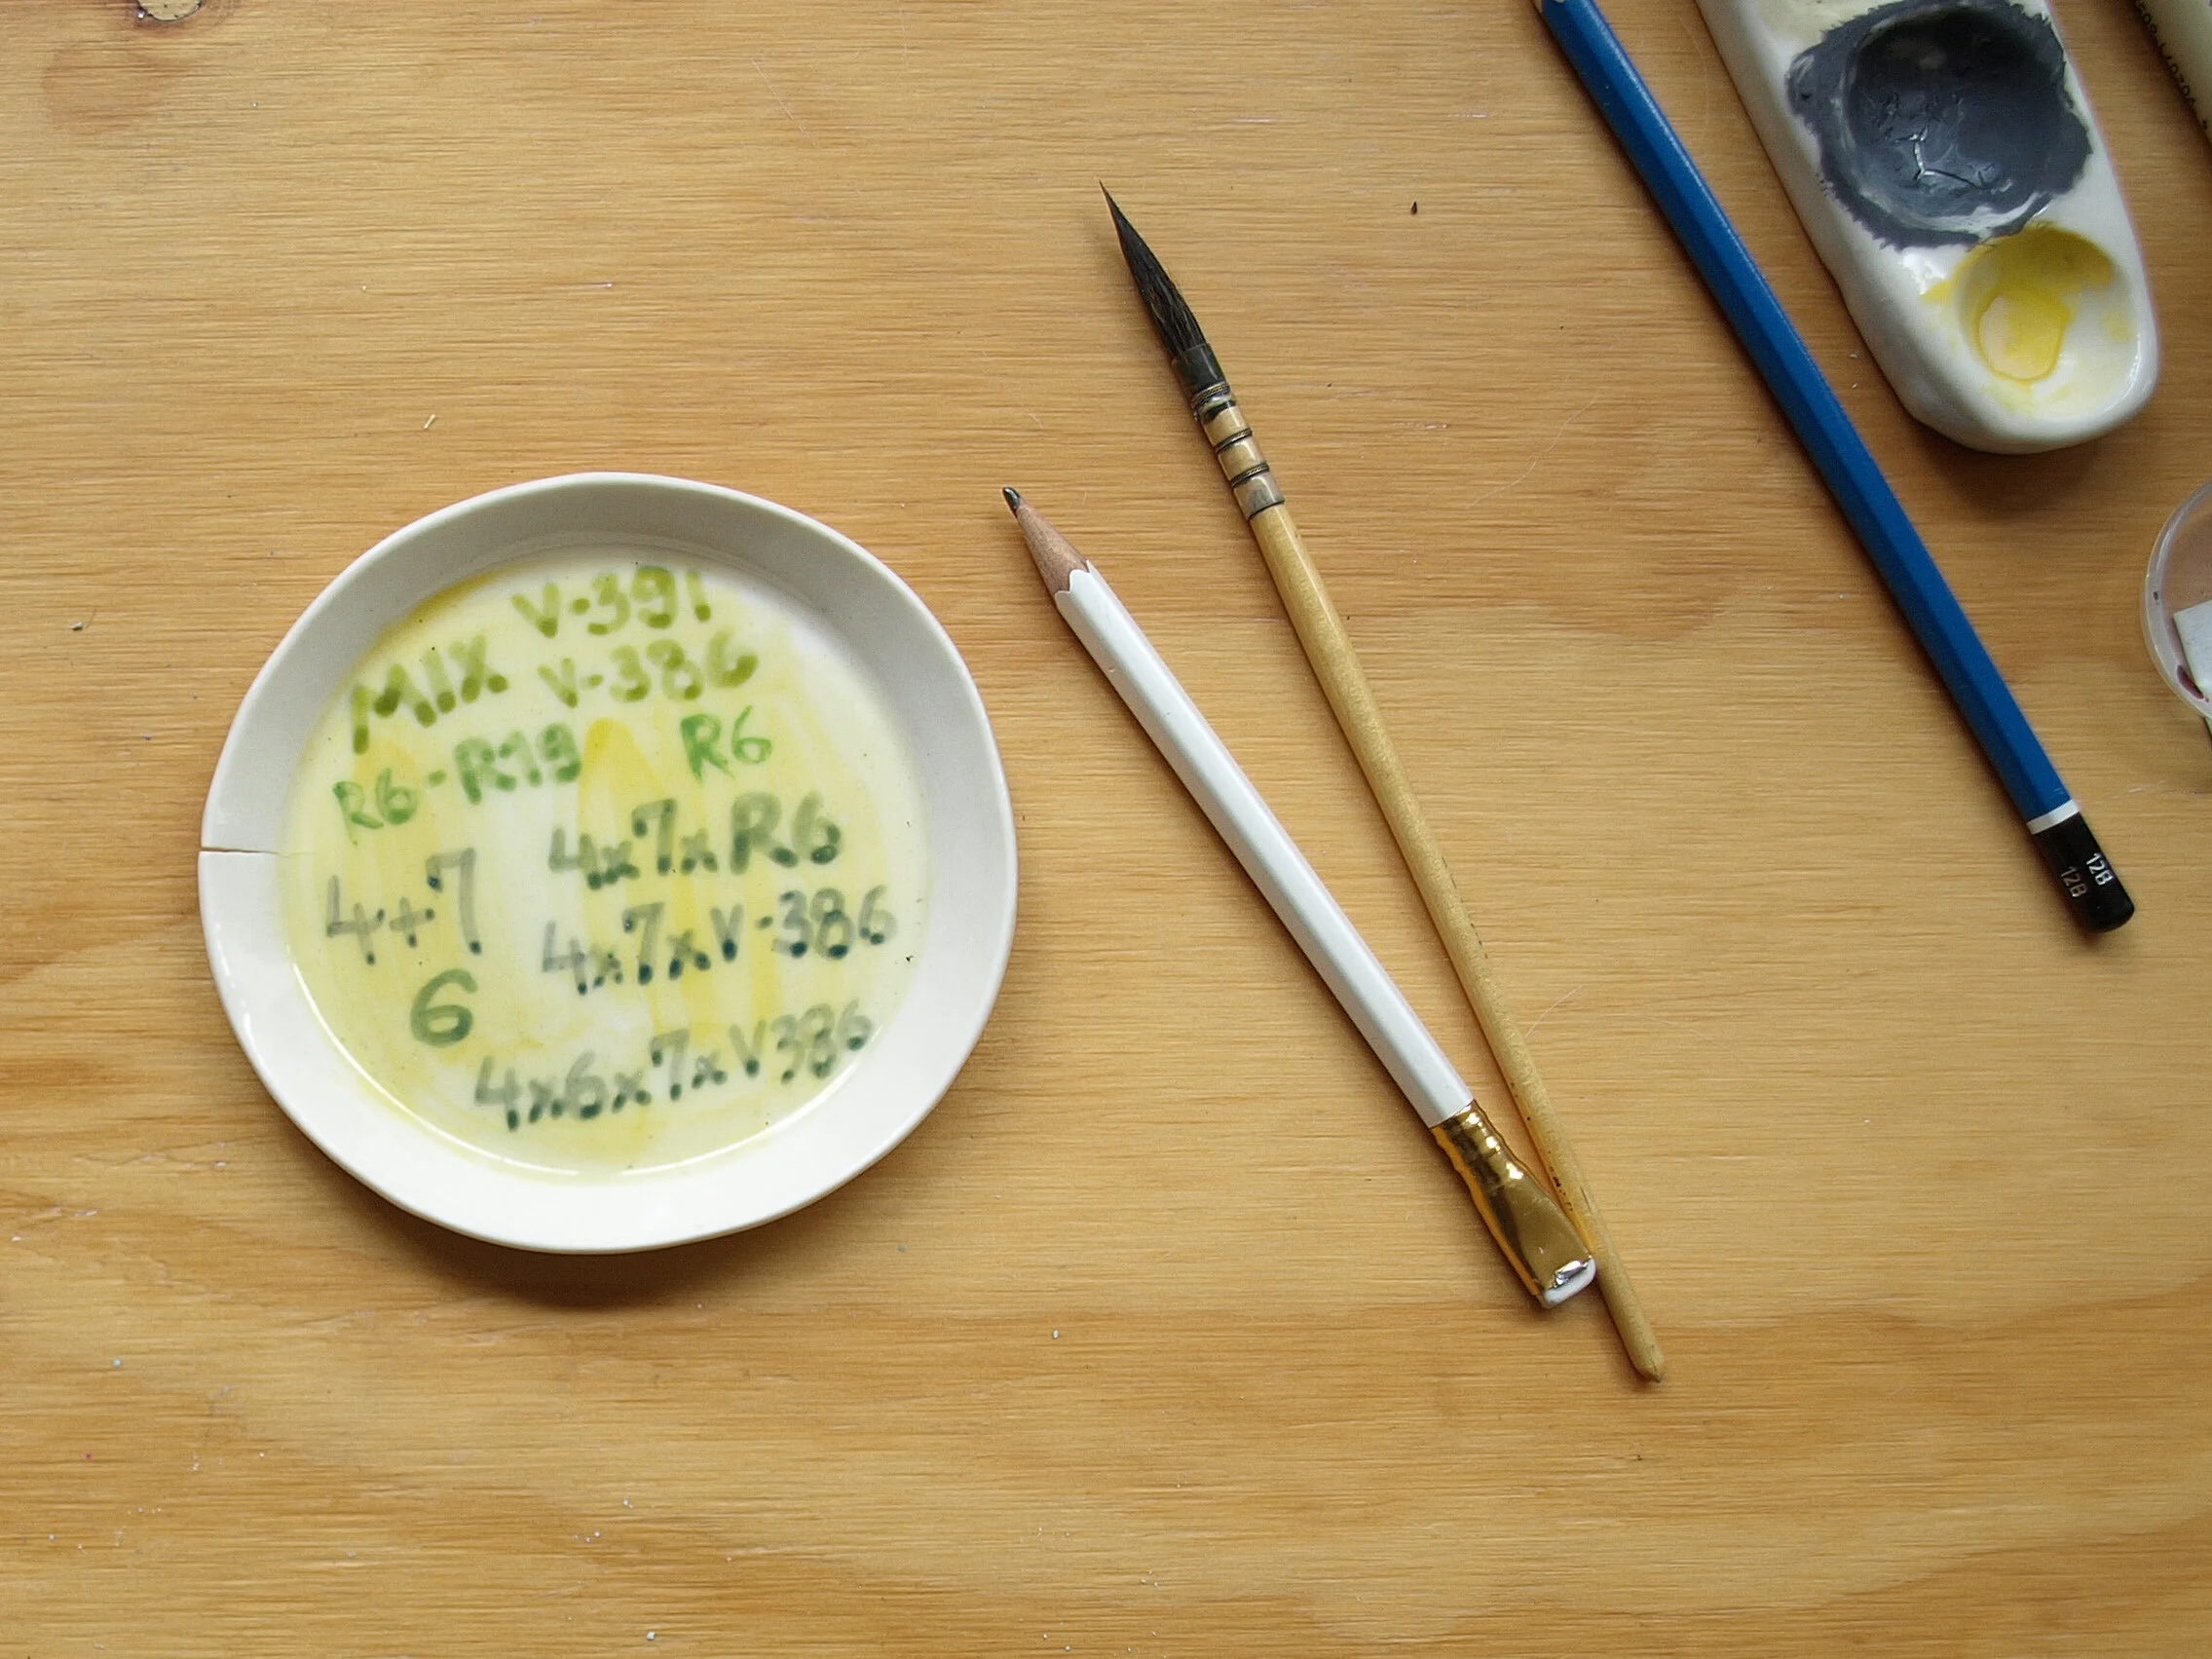
I mixed various underglazes and applied them on the yellowish colour that would be the facade. I needed to see if the underglazes would react differently if applied on yellow than on the usual white.
I tried a classic blue and yellow and then used the base colour R6 (the brightest green, bought in the pottery town of Shigaraki in Japan) for the main contenders. I sent the tests to the couple who commissioned the piece and we agreed on the right mix.

I kept the green mixture ready for when the painting began. I didn’t need much as it was just a few doors and the railings to paint and I loathe to mix up too much paint which is then not needed. Hoarder? Me? Maybe I just deeply despise the idea of wastage ;-)

The next step in the process was to sketch up the design of the house itself. I will do these sketches in the same size as the drawing that will go on to the pot. The scale is helpful and it also serves as the basis for the image transfer.
Whilst the gate covered the facade of the house, I decided it would take a lot of the detail away from the house so decided to add it on either side of the building and surround the pot. Once this was approved by the clients, I dived into painting it on the planter.
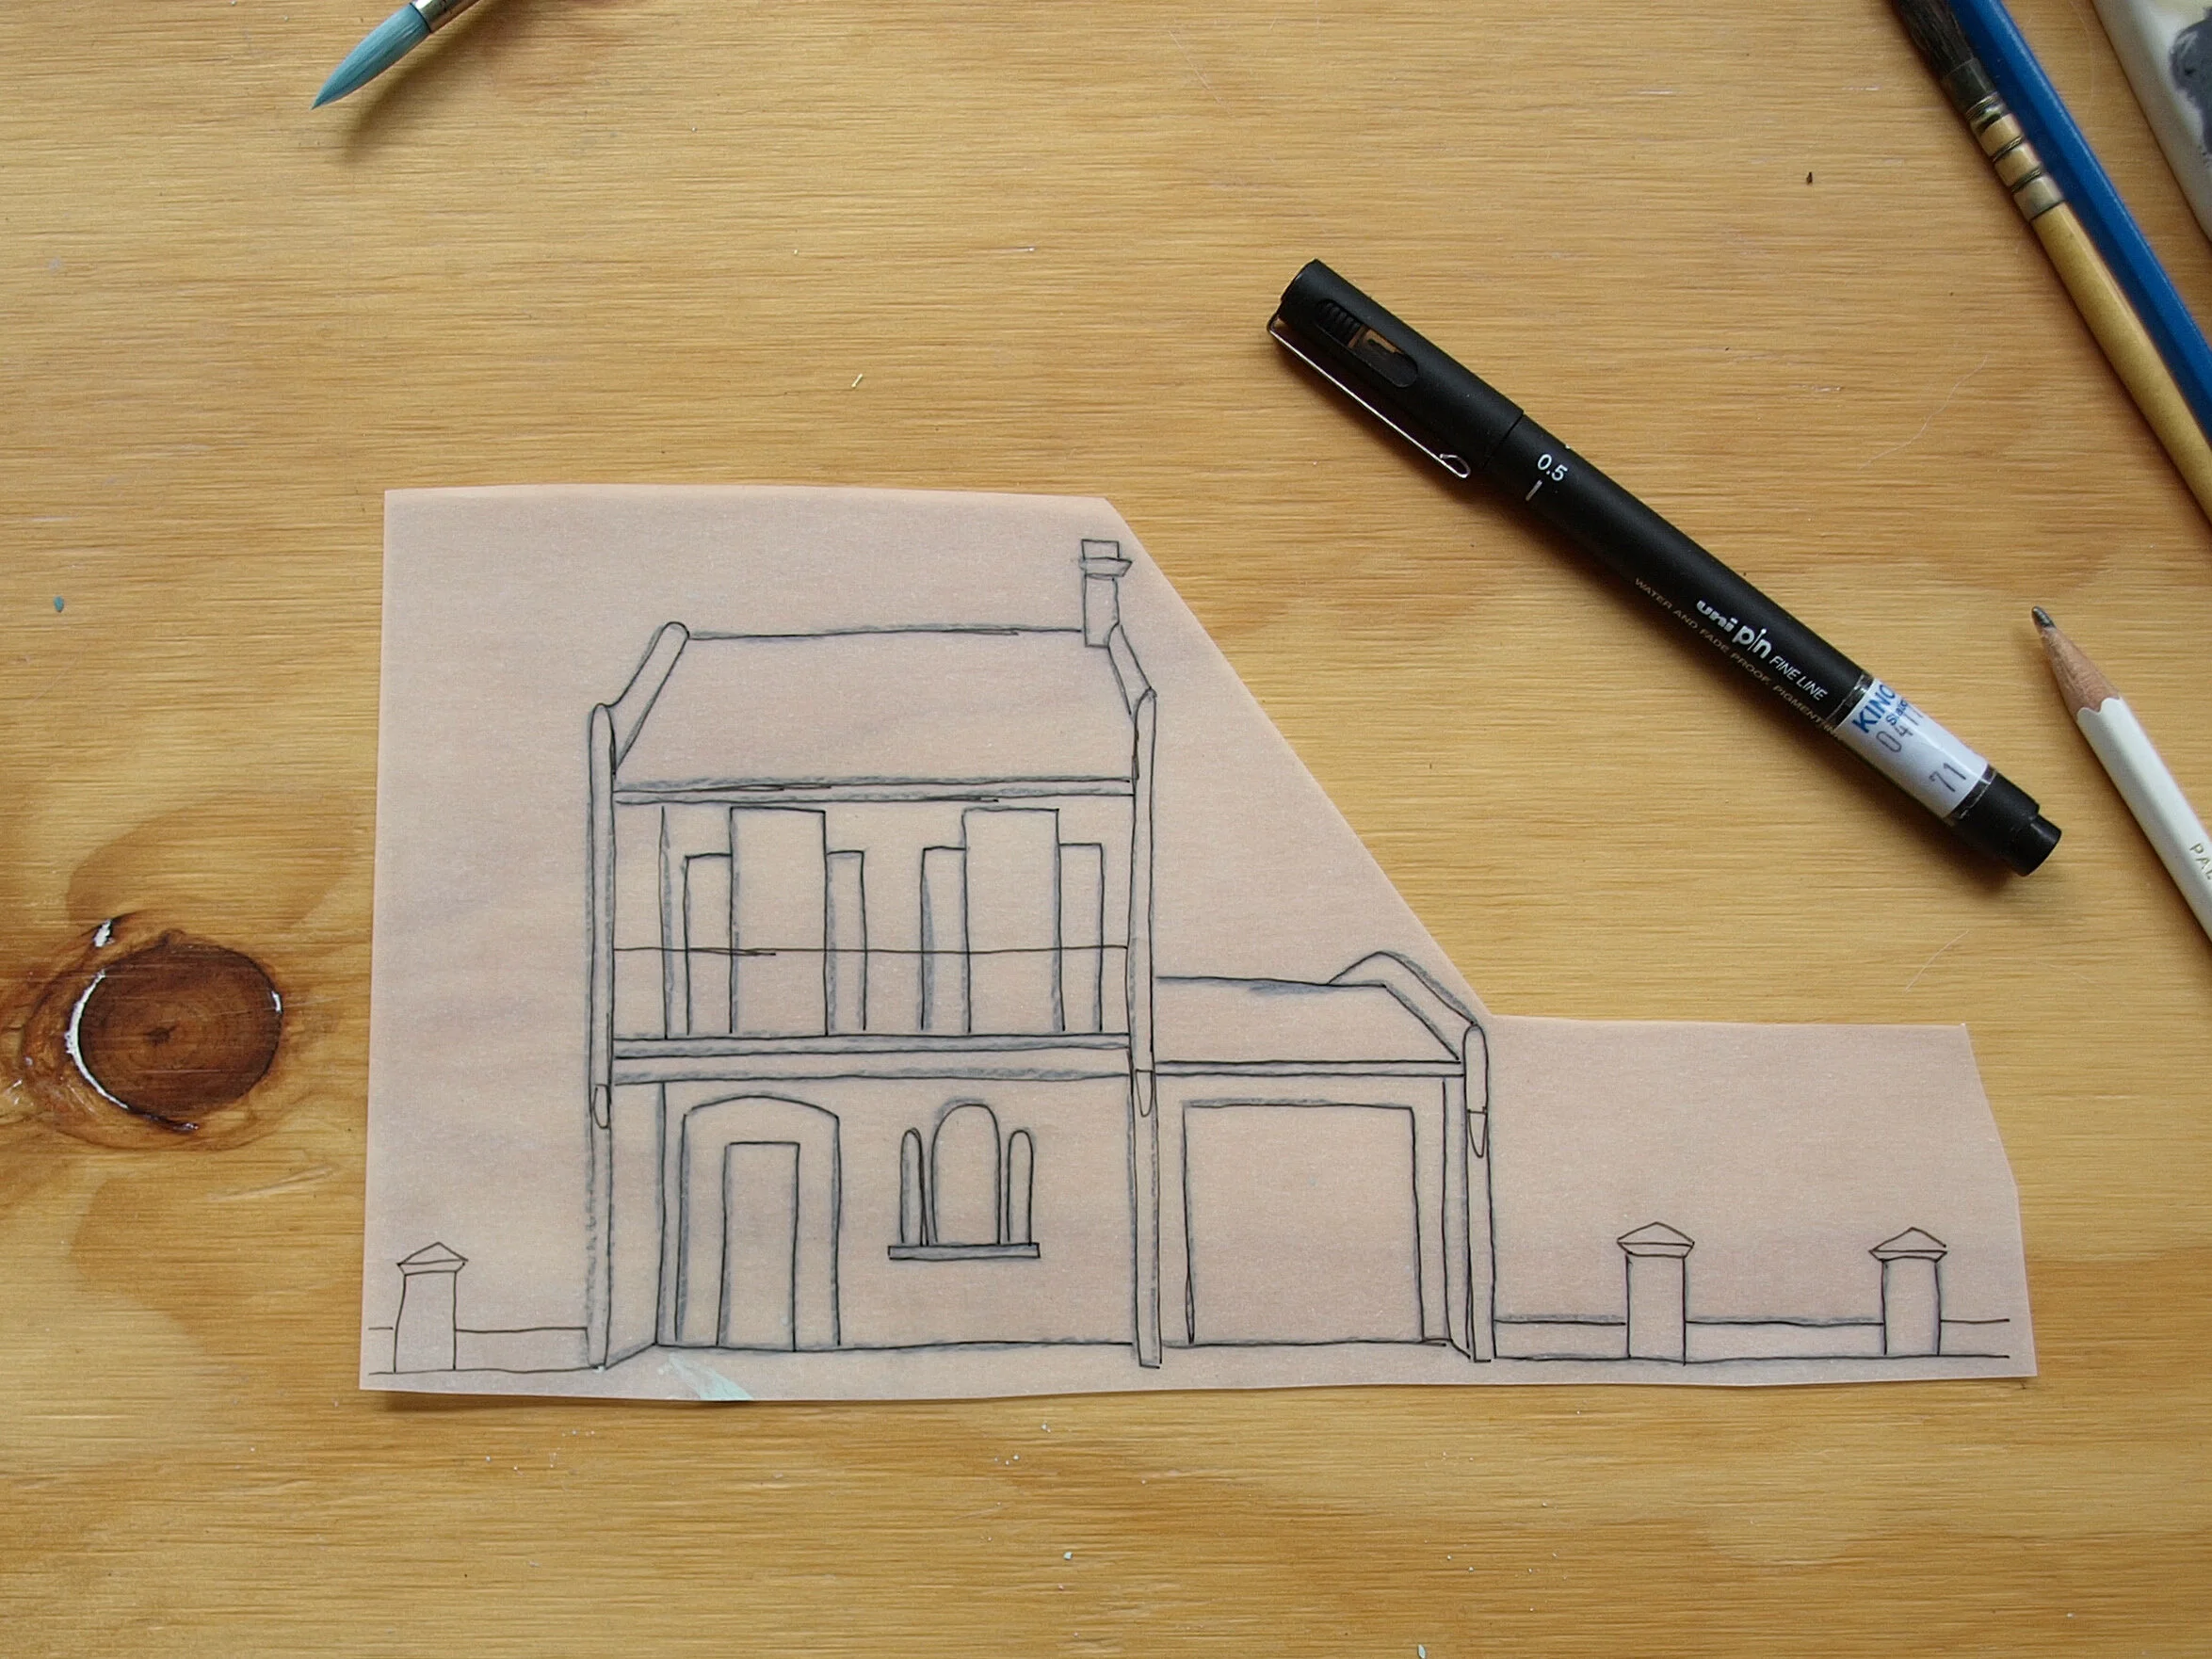
With a sheet of tracing paper and a non-smudging pen, I traced the outline of the building, windows and other features of the house that would be useful to have as guides.
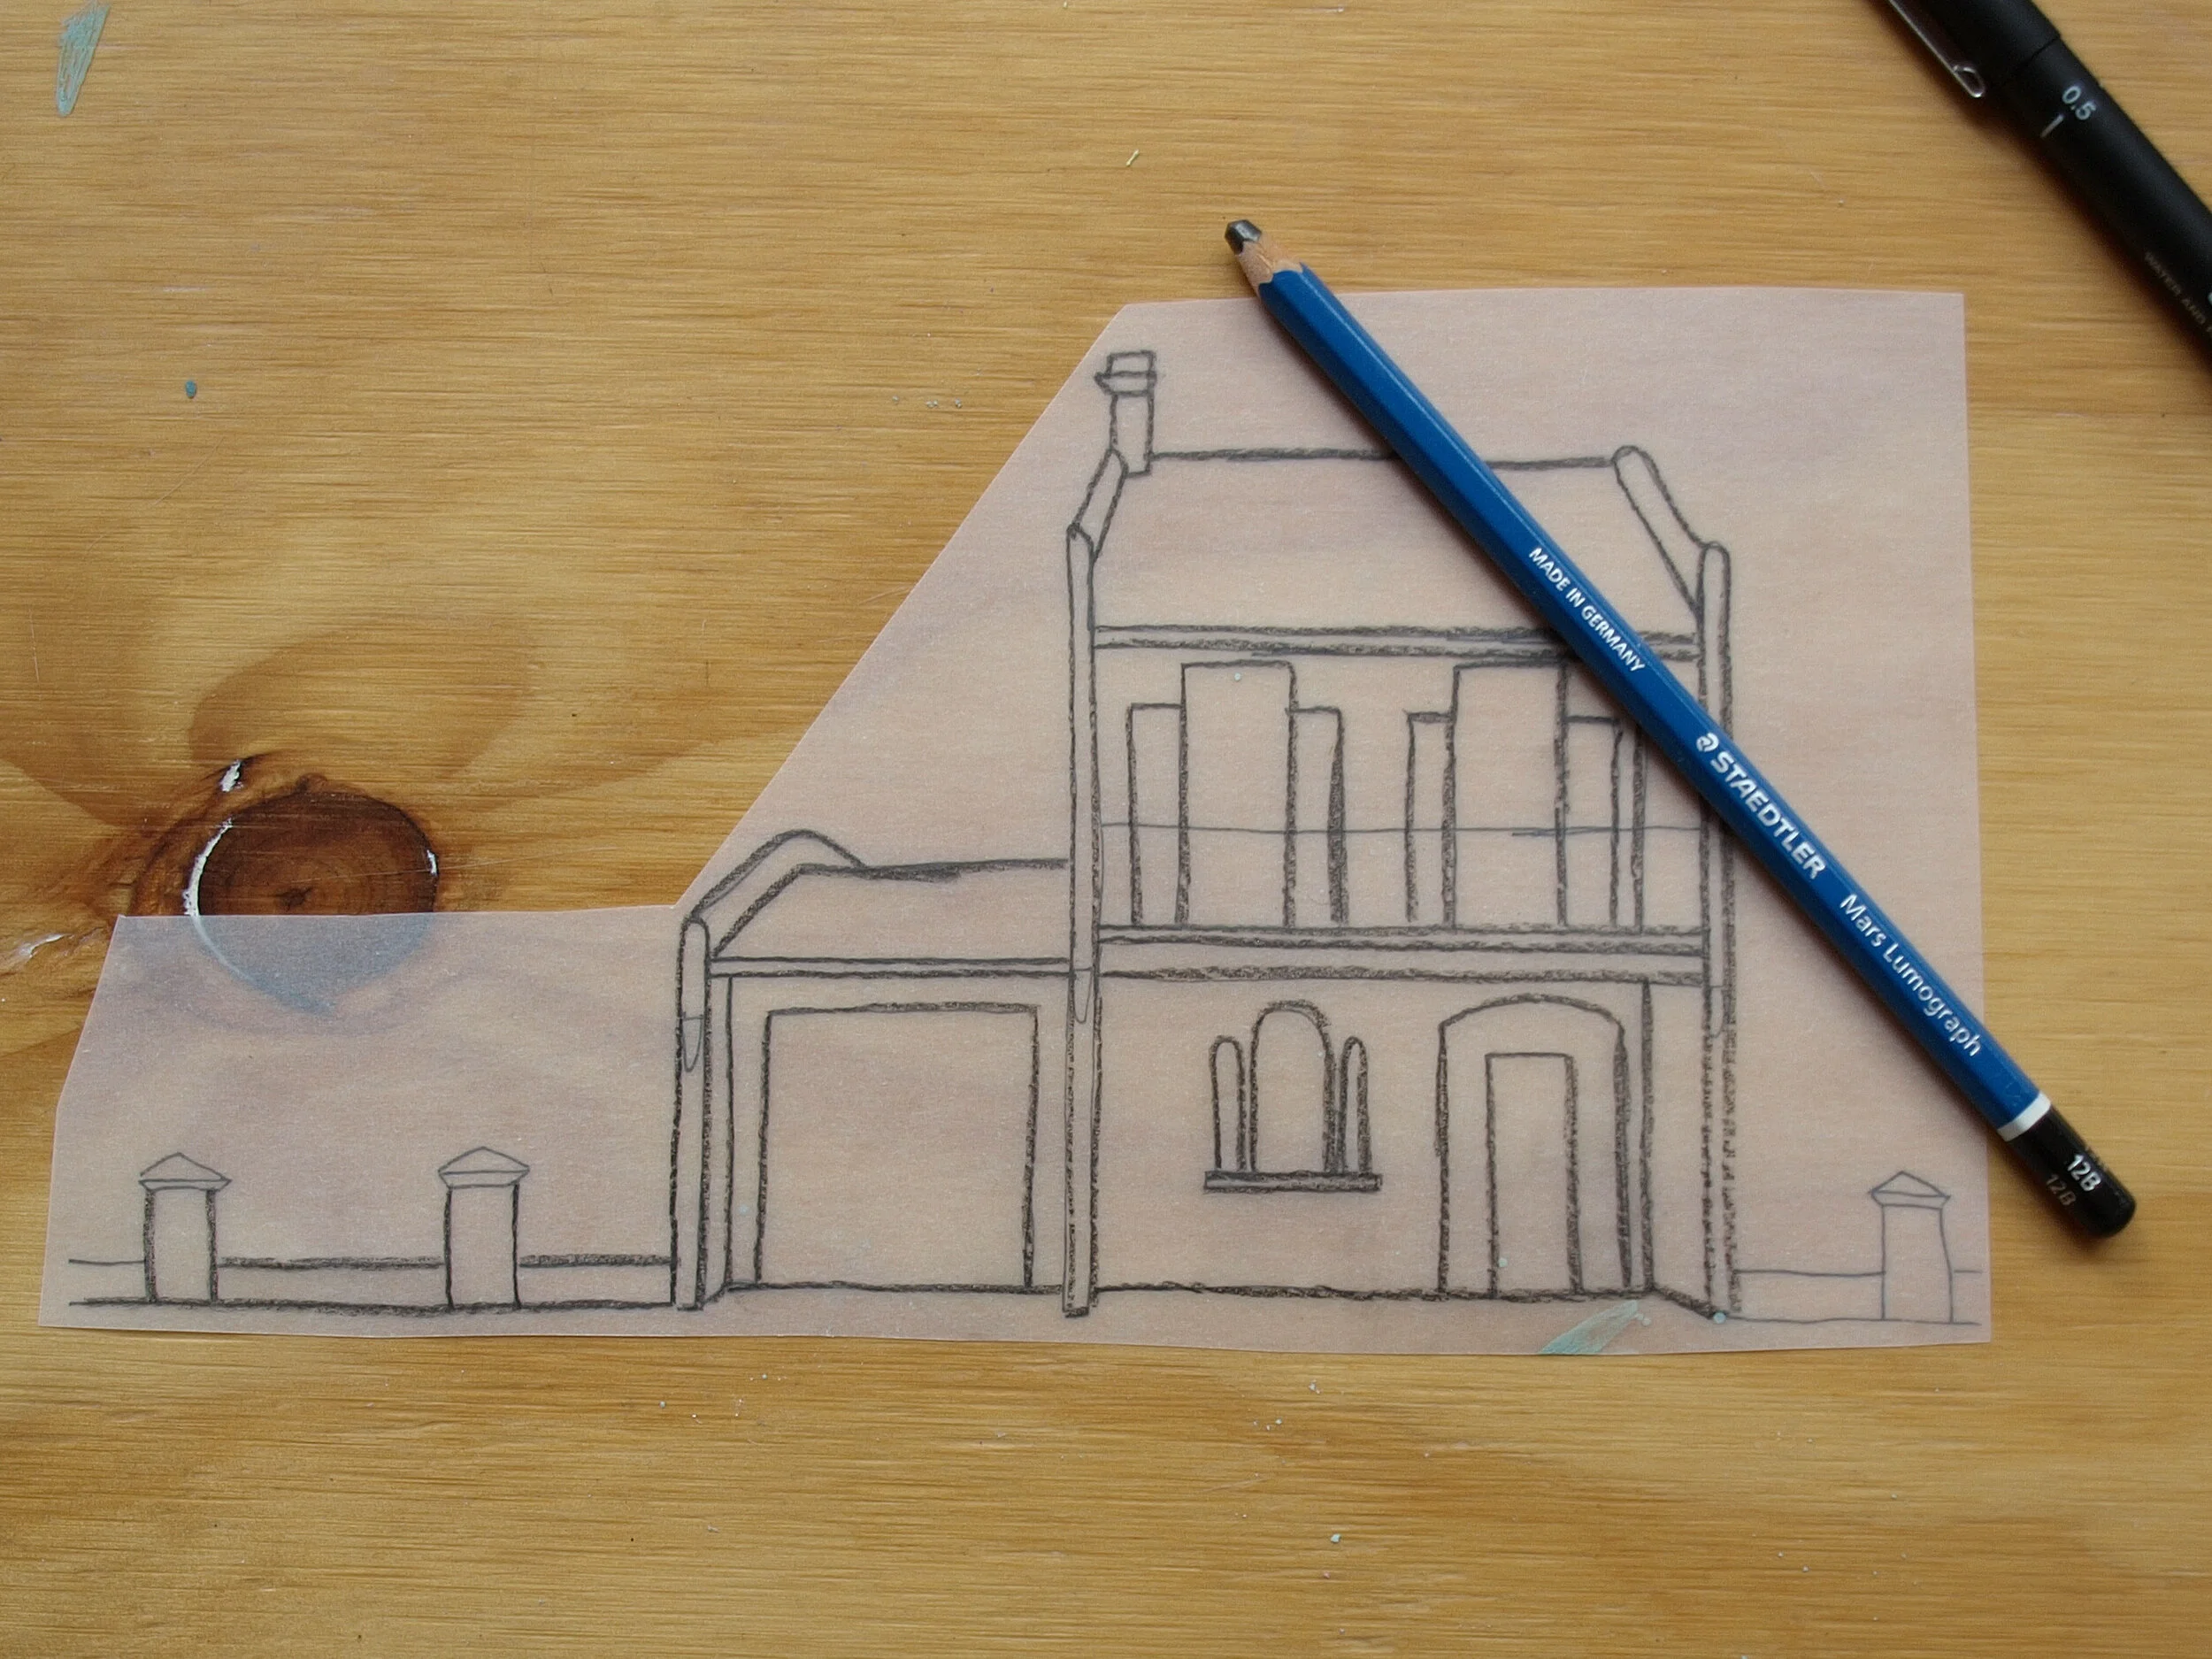
I flipped the sheet of tracing paper and traced those very same lines on the other side of the paper. I used a very soft pencil (this one is a 12B) as the lead in the pencil would easily transfer.
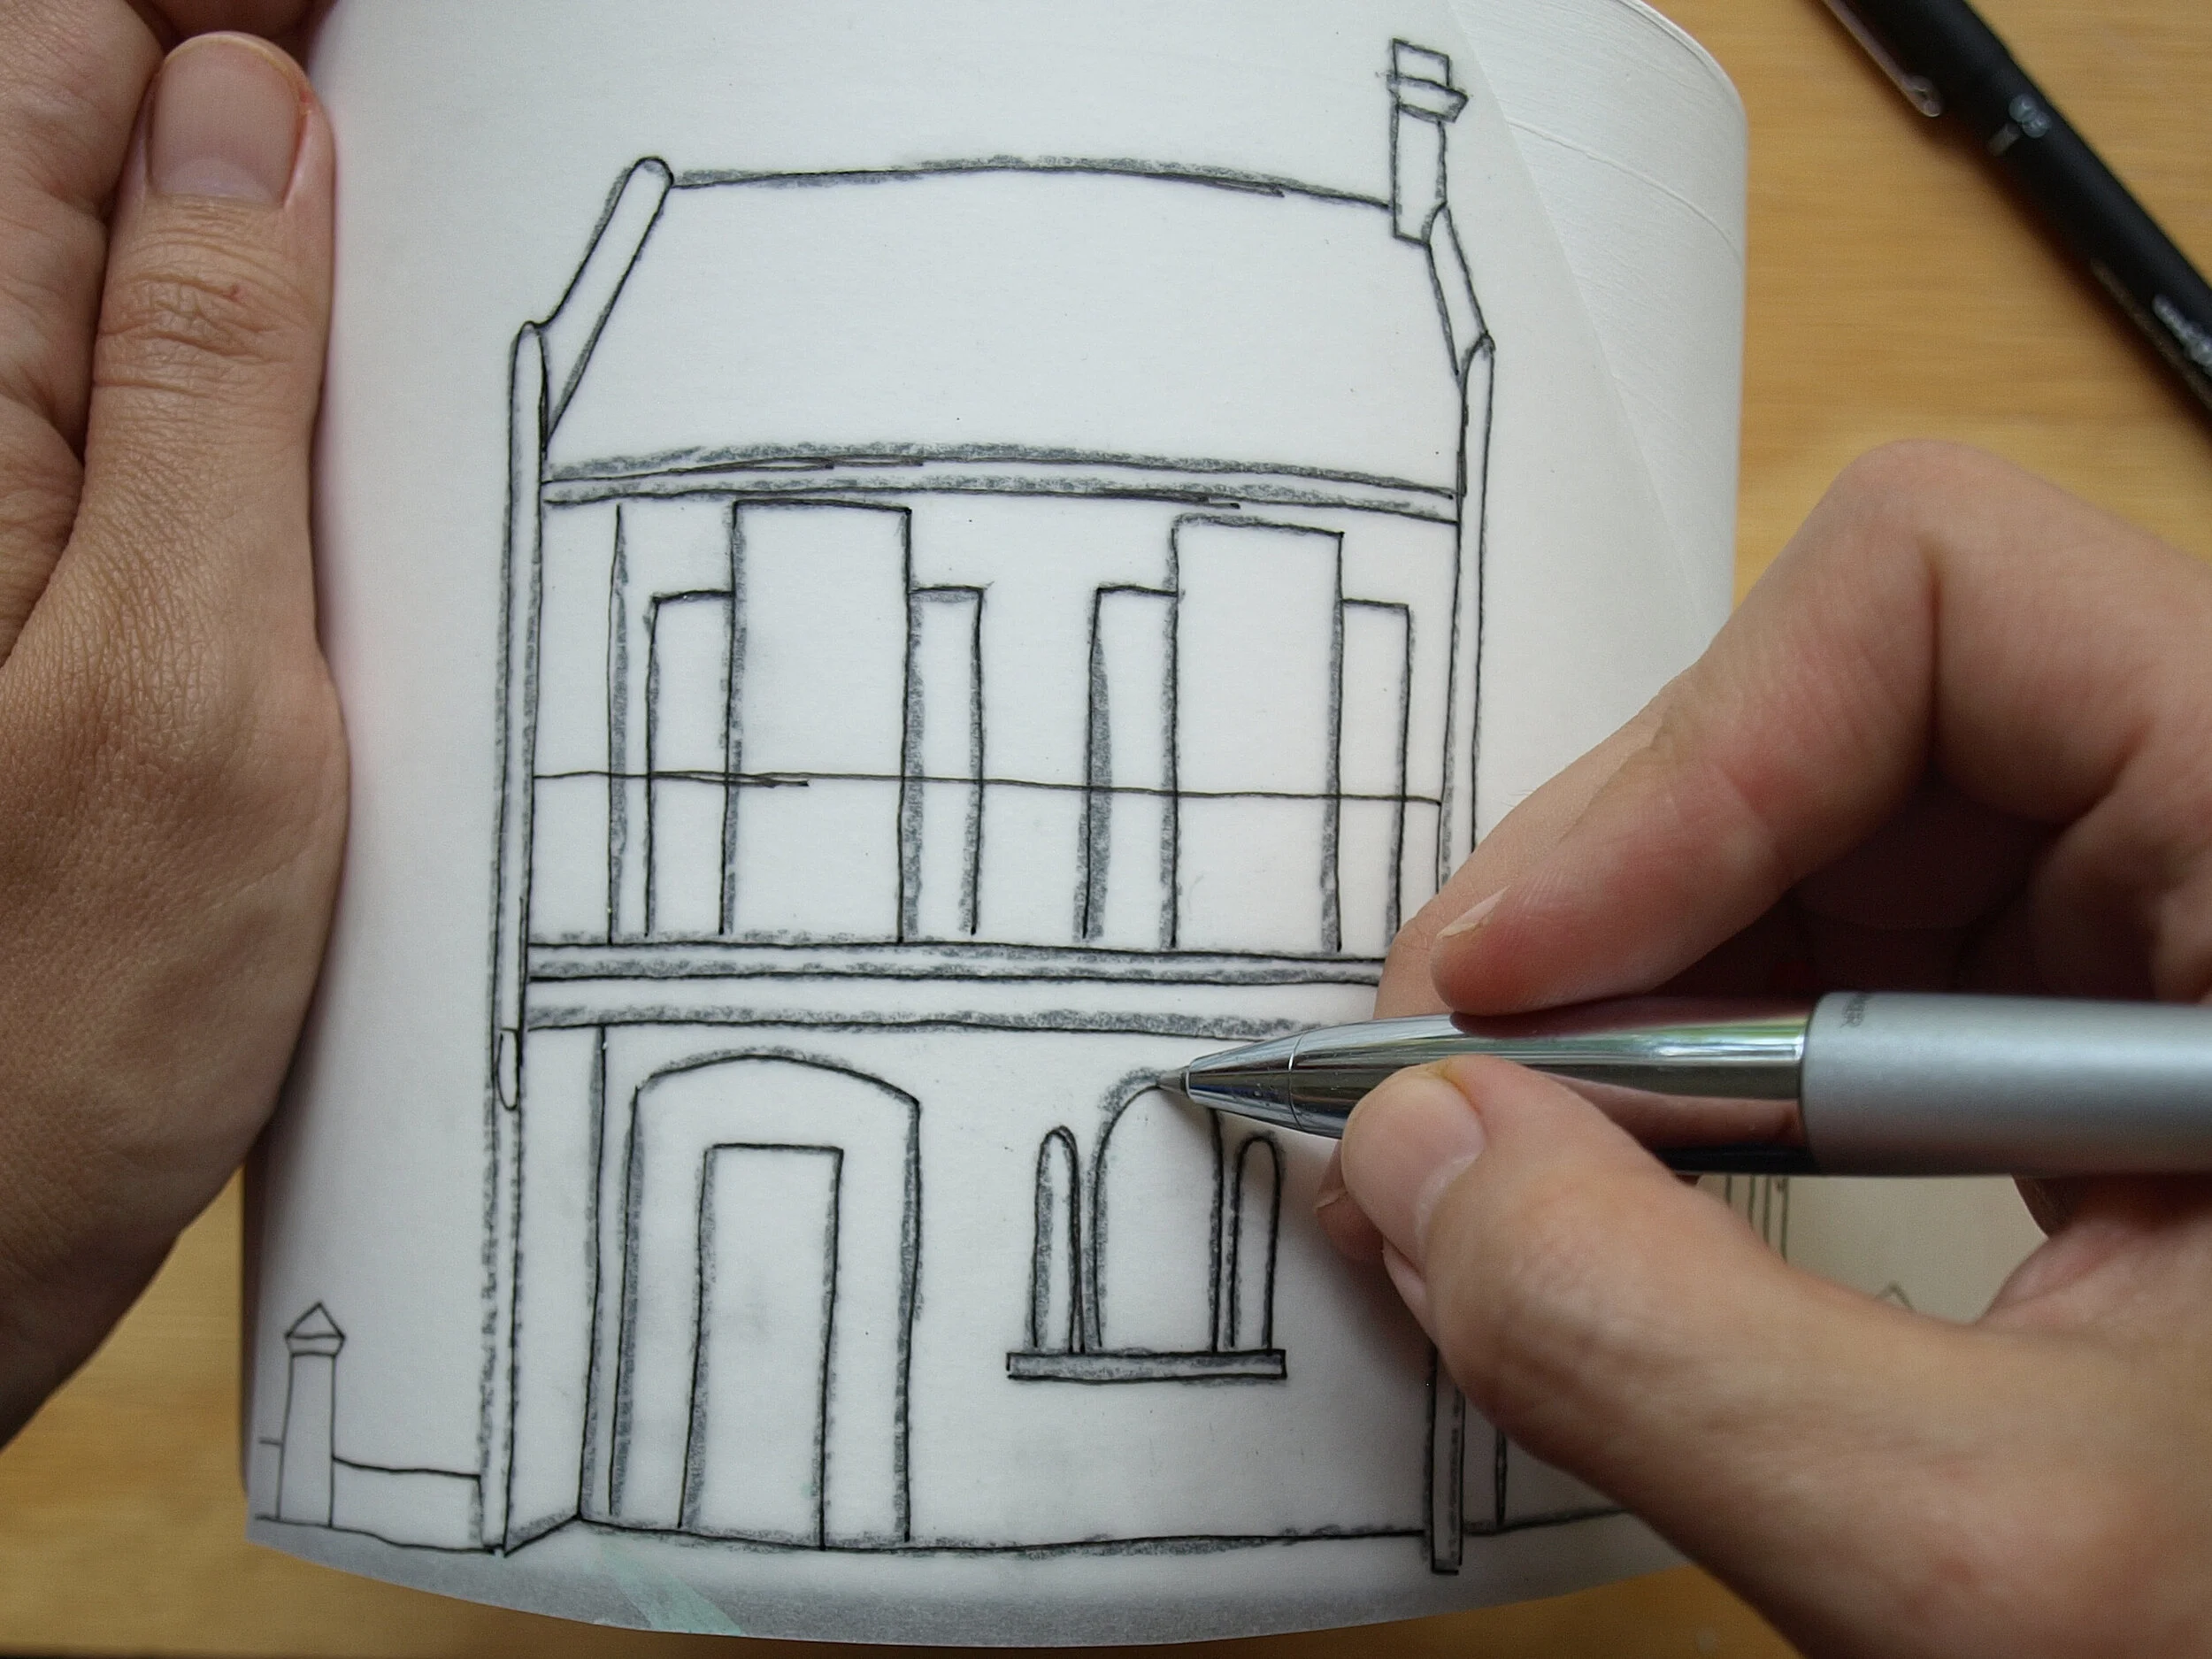
I then placed the transfer paper, right side up, on the planter. I used masking tape to keep the image fixed and a dry old ball point pen to press on to the image - you could say that this was the 4th time I was drawing the house!
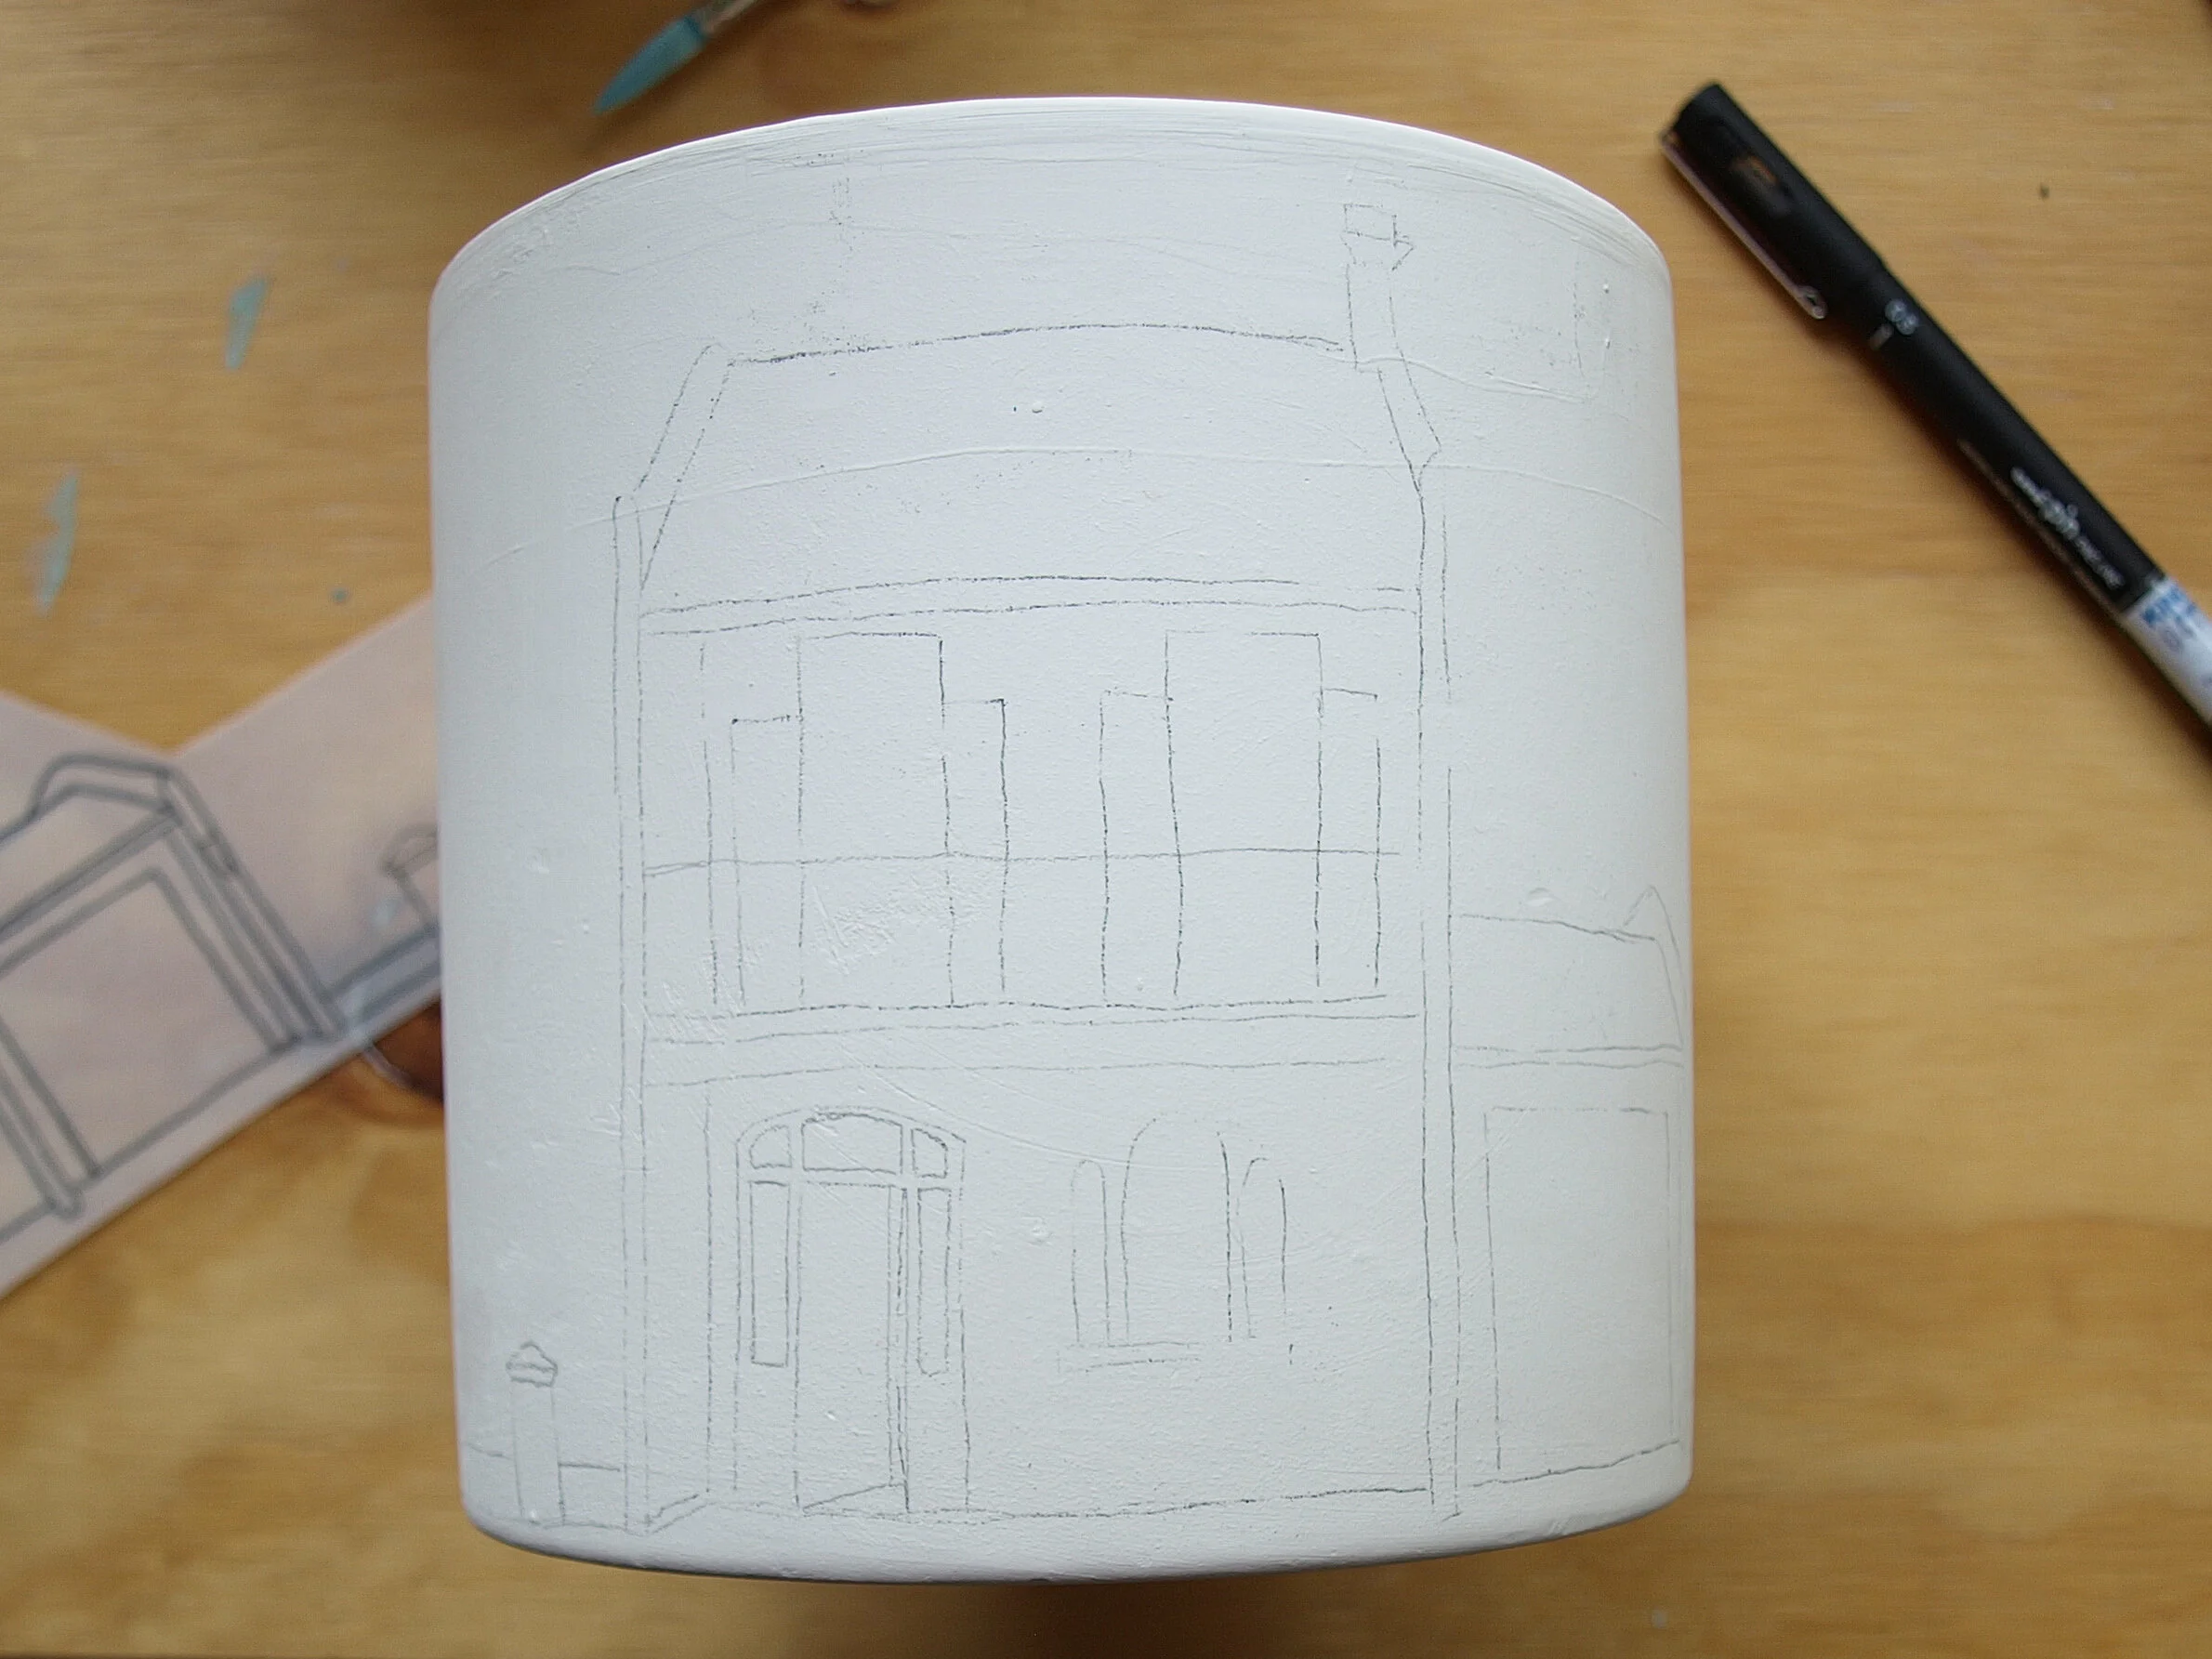
Once I finished, I removed the transfer paper and, as with everything in clay, was relieved to see the image had transferred well. Had I used a harder pencil, it wouldn’t have worked. The good thing about lead is that it burns out in the kiln, so even if I make a mistake, no one would ever know….
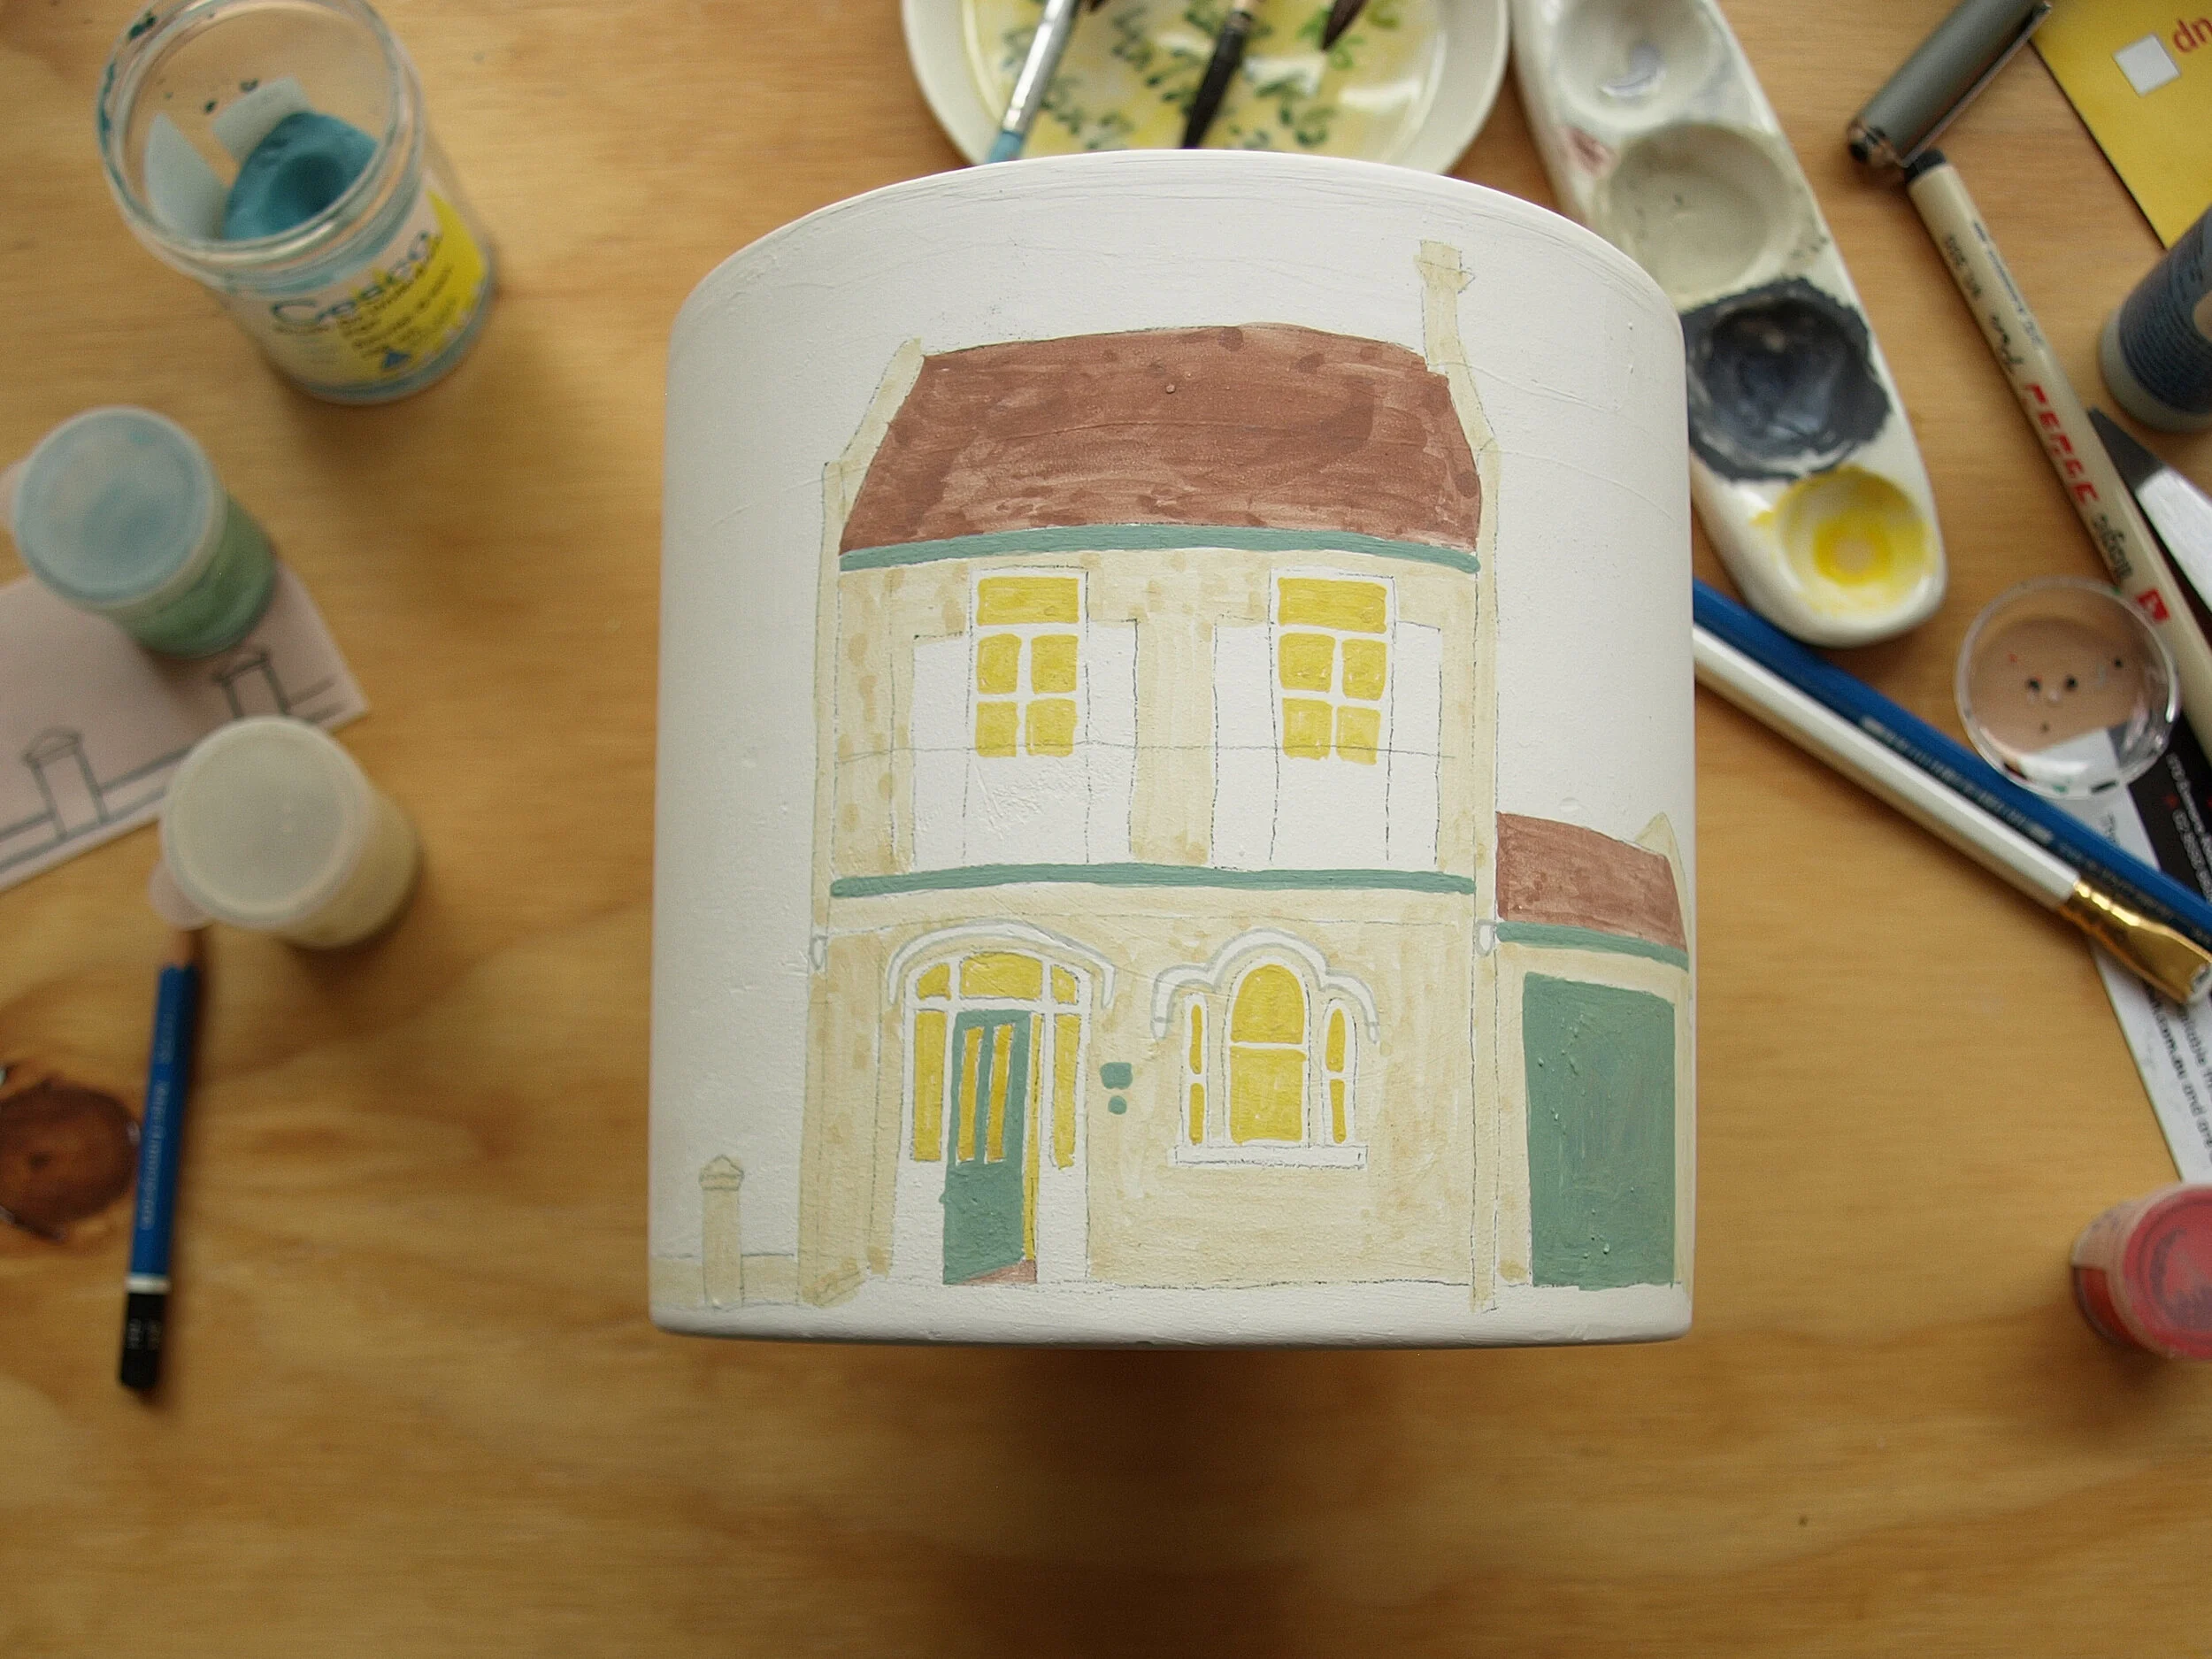
With the image in place, I painted the planter with underglazes using a variety of brushes. I tend to avoid synthetic brushes as they don’t hold much paint on them and they loose their shape pretty quickly. So I will meticulously clean my brushes after every use as underglazes are pretty harsh on the fibres.
I don’t use bold colours and try to apply the paint as I would watercolour or translucent gouache. It gives a more painterly feeling and I love to see the inconsistencies of the brush strokes at the end.

Once the piece is painted, it’s time to do the black lines. I have tried to skip this step and because my style is so detailed, it’s just looked awful. I don’t like thick black lines either, or underglaze pencil (which is what I used to use) so applying the black lines with the thinnest brush I have (bought in Japan as well) is one of the most time-consuming parts. But I think it’s worth it! Maybe I’m too much of a perfectionist.
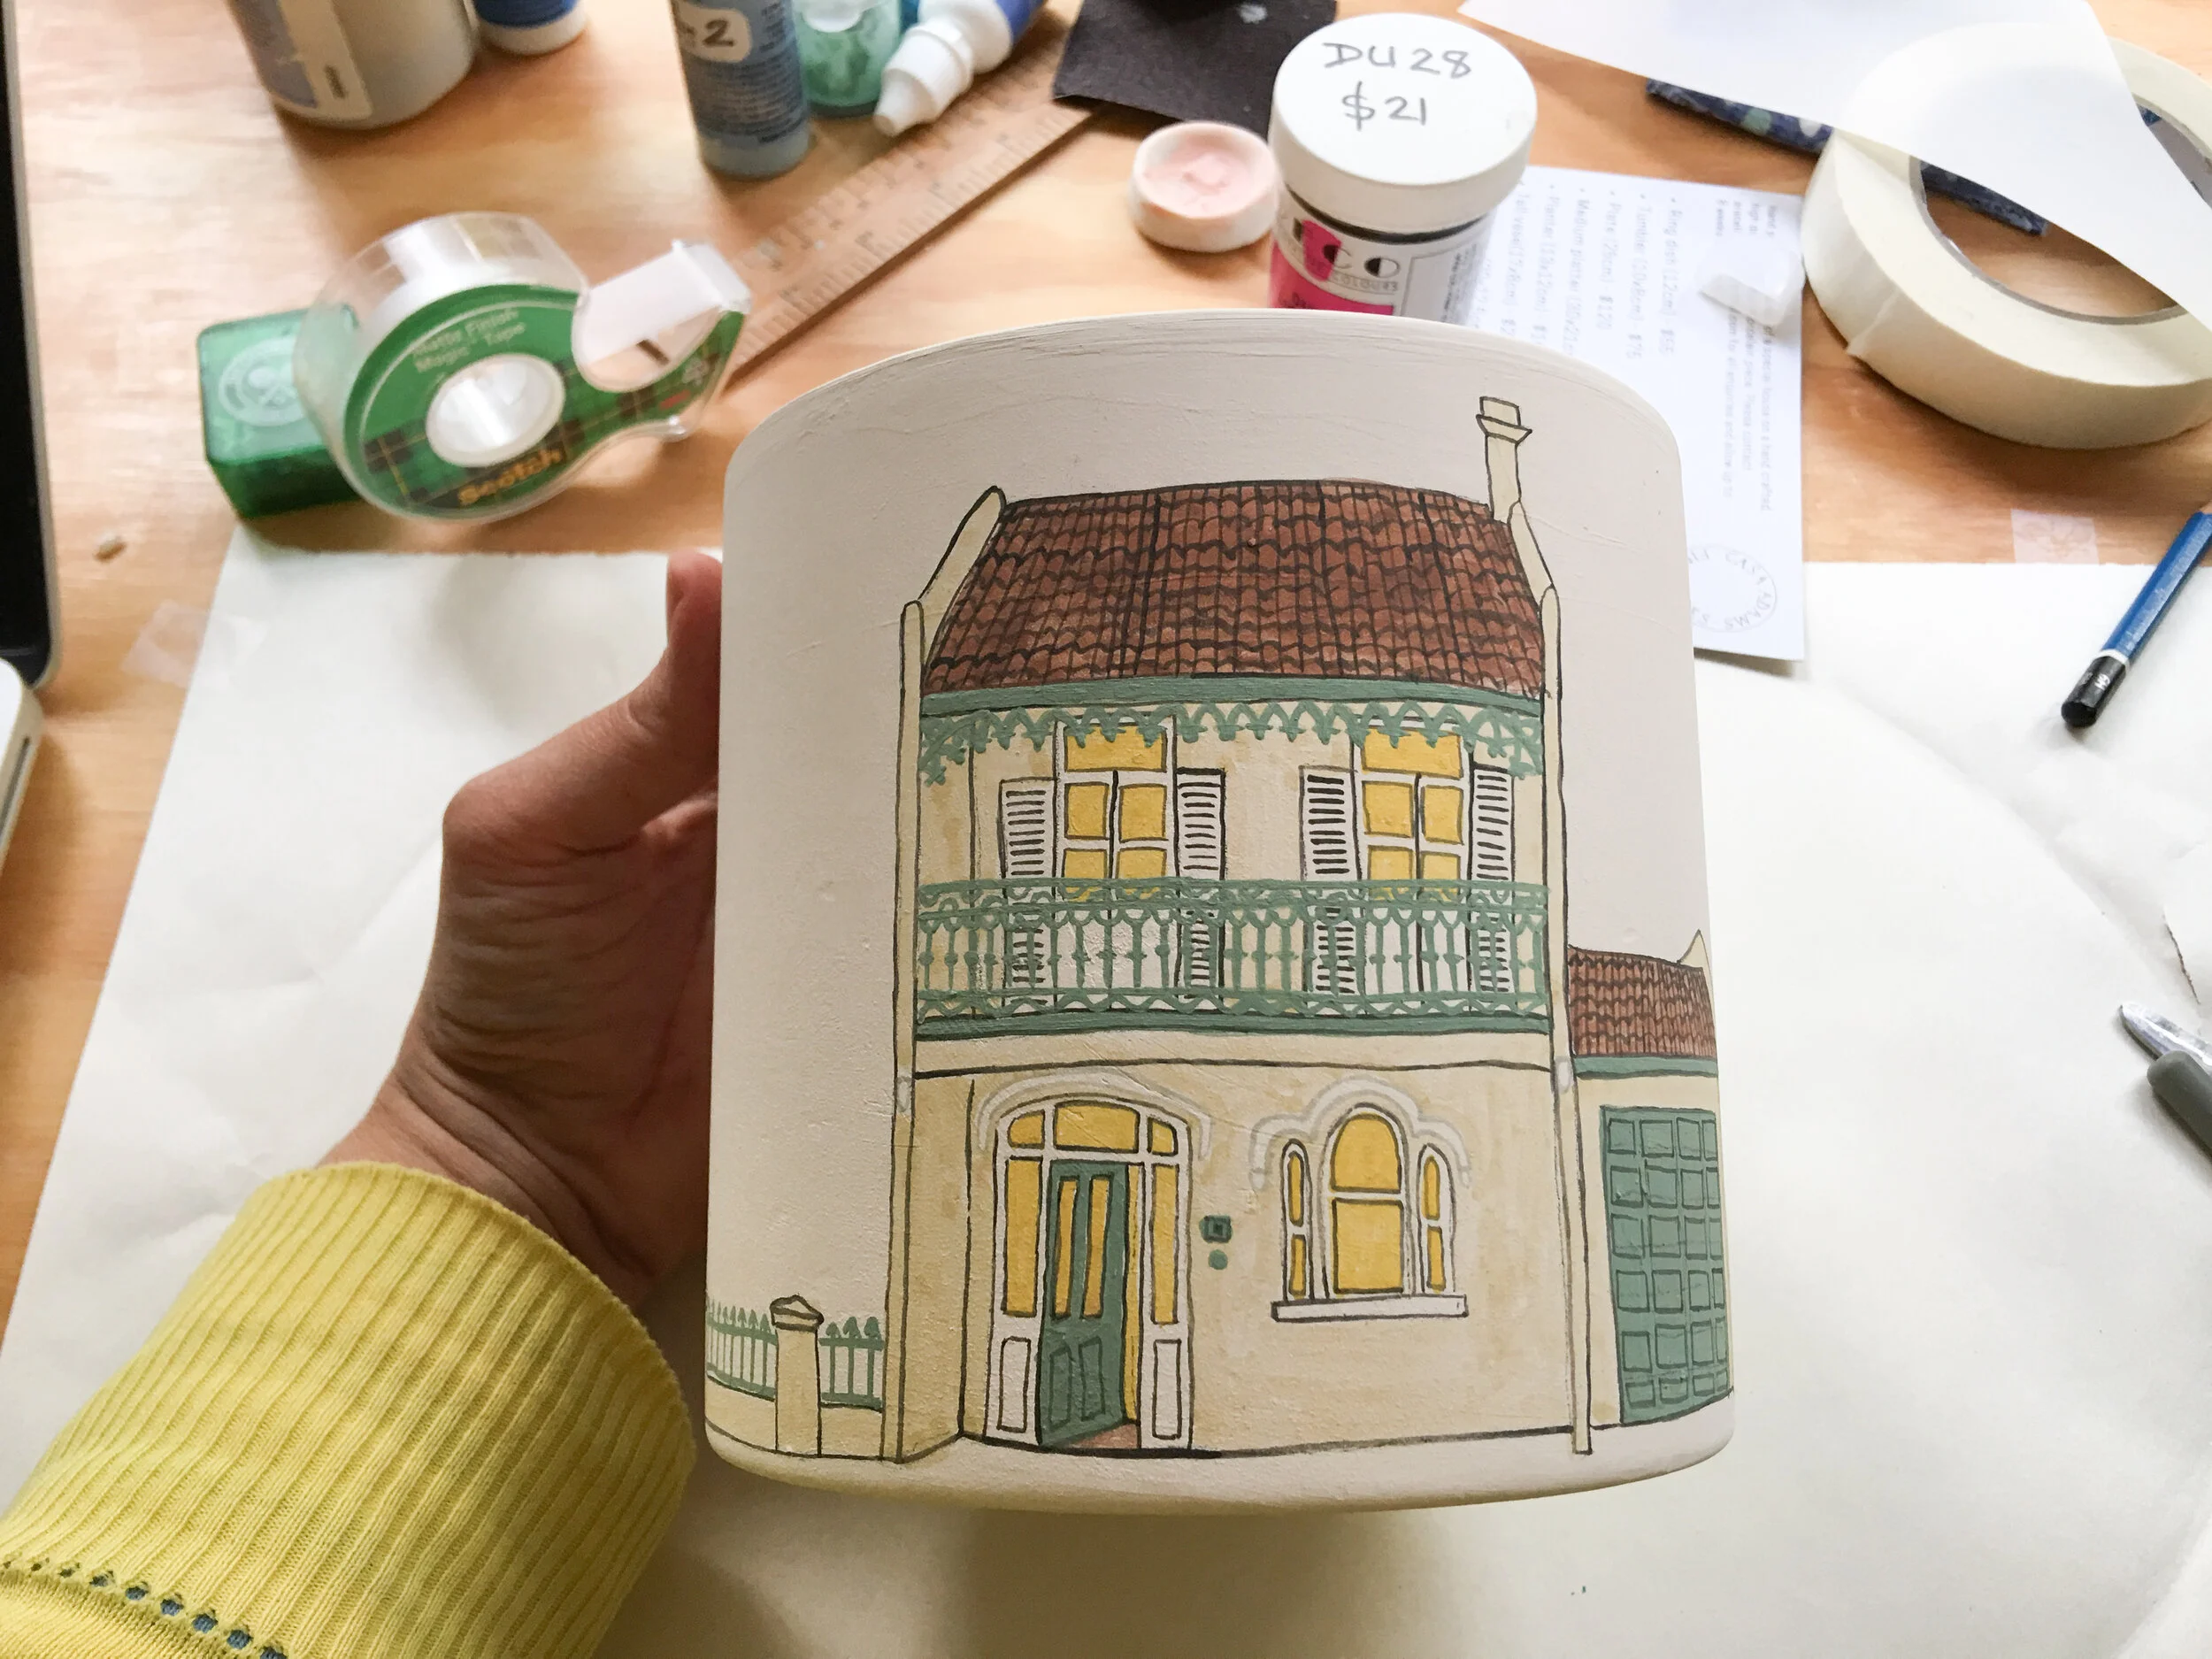
Normally I would have finished the piece by now, but as it’s a terraced house, with its lace ironwork, I leave that for last. I applied various coats of the green mixture and let it dry.
The next step was to glaze it, but I’ll leave my tricks for glazing for some other time ;-)
Hope you enjoyed the demo!